Saturday, January 26, 2013

TRB: The Cheesecake that was Meh.

Last week I mentioned that I'd be reviewing Alton Brown's Sour Cream Cheesecake recipe. (FYI, I usually embed a link in the name of what I'm reviewing to the original post. But for those who want it, I will also begin posting the full url at the bottom of the post!)

Jared liked the pacman look.


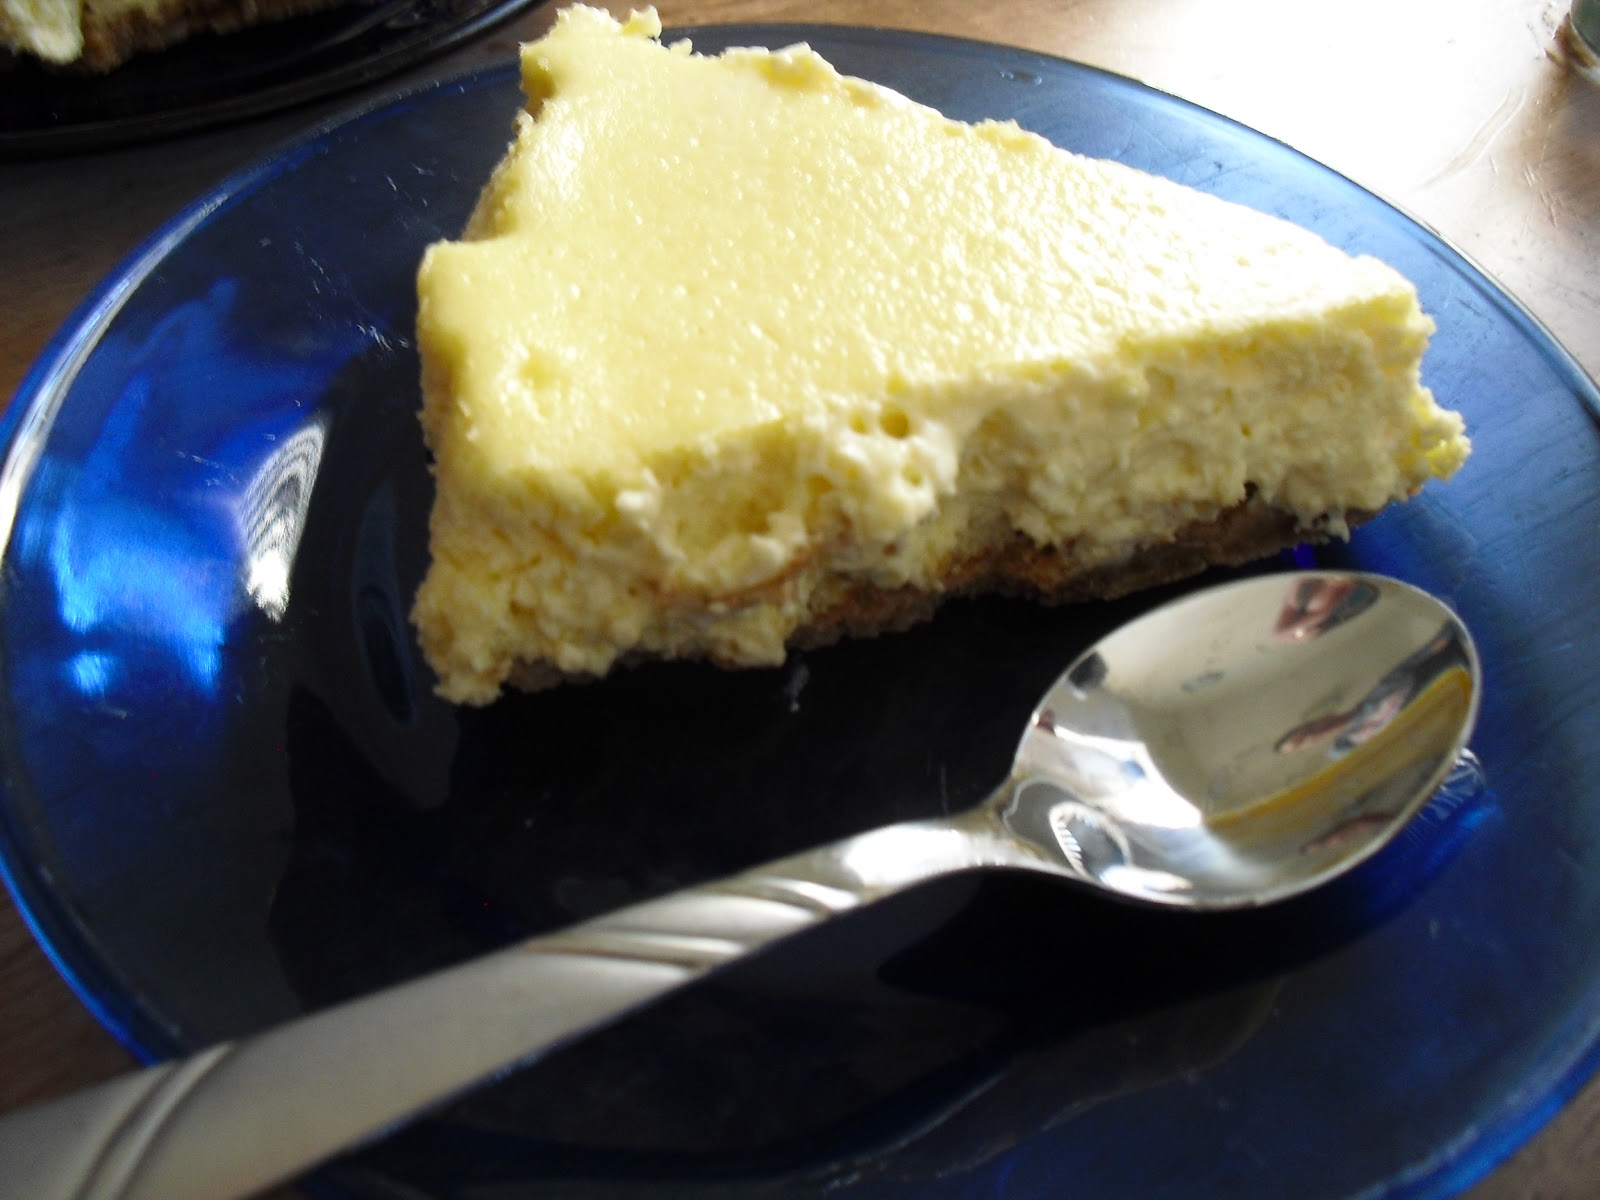
Like almost everything I make, I had to adjust to make it apartment-sized. The recipe calls for a 9"x3" round. I have a 9"x2" round, so I shrunk the ingredients to match a bit.
So here's the breakdown:

Successes:

  • It was cheesecake consistency. Always a good place to start.
  • The flavor was good. Not the best, but definitely edible. A mild cheesecake, which could appeal to picky eaters.
  • I liked the parchment paper lining idea. It could be a little on the tricky side to configure, but it made preparing and plating a breeze. It also rocks for those (like me) who lack a springform but still want that look.
  • It was pretty easy to make.
  • Jared really liked it. He ate most of it.
To Be Improved On:

  • The flavor was very mild. It hardly had any of that delicious zangy cream cheese flavor to it. It almost tasted like I left the cream cheese out completely. 
  • I know, however, that I did not leave the CC out because it was lumpy. I realize this is my fault, not the recipe's. I have been told that it results from not letting the CC soften enough. Is that true? Tell me what I did wrong in the comments, please.
  • Crust wasn't as crispy as I liked it. I'll have to bake it longer next time. 
  • Let's face it. It just wasn't mom or father-in-law's cheesecake. Sigh.
Will I make it again? Probably not. I'll beg Mom for her recipe first.


On another note, remember the pita? Sliced in half, topped with mozzarella, fresh cut roma tomatoes and green bell peppers, baked at 350 for 12 minutes. I made them for lunch and was in heaven. Jared came home and asked for his own. Score!


http://www.foodnetwork.com/recipes/alton-brown/sour-cream-cheesecake-recipe/index.html

Saturday, January 19, 2013

TRB: Cauliflower Crust Pizza


Today's recipe comes from Healthy Tasty Eats! and can be found here. But for simplicity, I'll copy it here, too:
Ingredients:
1 cup cooked, riced cauliflower
1 cup shredded mozzarella cheese
1 egg, beaten
1 tsp dried oregano
1/2 tsp crushed garlic
1/2 tsp garlic salt
olive oil (optional)
pizza sauce, shredded cheese and your choice of toppings. 
DirectionsTo "Rice" the Cauliflower:Take 1 large head of fresh cauliflower, remove stems and leaves, and chop the florets into chunks. Add to food processor and pulse until it looks like grain. Do not over-do pulse or you will puree it. (If you don't have a food processor, you can grate the whole head with a cheese grater).
Place the riced cauliflower into a microwave safe bowl and microwave for 8 minutes. There is no need to add water, as the natural moisture in the cauliflower is enough to cook itself. One large head should produce approximately 3 cups of riced cauliflower. The remainder can be used to make additional pizza crusts immediately, or can be stored in the refrigerator for up to one week.
To Make the Pizza Crust:Preheat oven to 450 degrees. Spray a cookie sheet with non-stick cooking spray.In a medium bowl, stir together 1 cup cauliflower, egg and mozzarella. Add oregano, crushed garlic and garlic salt, stir. Transfer to the cookie sheet, and using your hands, pat out into a 9" round. Optional: Brush olive oil over top of mixture to help with browning.Bake at 450 degrees for 15 minutes. Remove from oven.
To the crust, add sauce, toppings and cheese. Place under a broiler at high heat just until cheese is melted (approximately 3-4 minutes). Enjoy!Note that toppings need to be precooked since you are only broiling for a few minutes.

So I made this tonight, and it was actually pretty easy. A gal from my ward had posted it as a gluten-free alternative to pizza crust. Hubby and I aren't GF, but a crust made from veggies sounded pretty healthy. I used frozen cauliflower to start with. We don't have a food processor, but we do have a Salad Shooter, which I love. It "riced" the cauliflower beautifully. Once it was cooked, I threw it in with the mozzarella and seasonings, using Kosher salt instead of onion salt, and then tossed it with the beaten egg.
It was a warm gooey mess. Still, it smooshed nicely onto the cookie sheet, and crisped up pretty well around the edges. Jared suggests smooshing it onto a preheated stone instead, for a crispier crust all the way through. Alas, we do not have pizza stone.
Once you cook the crust, dress as desired. We spread ours with some garlic onion spaghetti sauce and just more mozzarella. We left it plain, otherwise, in a fit of uncharacteristic culinary laziness. It went back in under the broiler for two minutes, at which point my smoke alarm went off, alerting me that my pizza was done and my oven really needs to be cleaned.
The flavor of the crust was delicious. It almost had the texture of a crispy, cheesy, thick crepe. Our biggest qualm with this pizza was that it had...dare I say it...too much cheese. It almost could have worked without mozzarella at all on top, because the crust is almost half-cheese. The picture above is mostly my own devouring, because it was a little much for hubby. So, if/when we make it again, we'll likely leave the cheese out as a topping, and include some fun peppers and things. I'd definitely recommend this for anyone who is gluten free or looking to include more veggies in their diet.

Keep a look out for my upcoming reviews: Alton Brown's Sour Cream Cheesecake (in the oven right now!) and Kristen Cashore's Bitterblue. Let's see if I can do book reviews too!

Stay

Friday, January 11, 2013

The Review Board: Pita Bread

...and hummus...sort of.


About a month or two ago, I attempted to make pita bread. Why not? It's tasty! Well, here's why not:
-With an oven above 400 degrees, I almost burned myself. A lot.
-They poof up, which makes them very hard to handle once cooked.
-I don't have a nice fancy oven stone, so I had to use a cookie sheet that loves to bend and warp during cooking.
-The recipe required you to flip the pitas half way through. Again, with the burning myself. (When baking, it's really better for me to keep my hands out of the oven as much as possible.)
-As I was trying to retrieve the now-sphericalish pita from the oven, I dropped it. Into the oven. Backstory: I started out this semester by dropping an oven mitt onto an oven coil. It caught on fire a little bit. In another adventure, I hit my hand against the other oven coil and had a very large, decently severe burn. I love baking, but I'm kind of afraid of our oven now. Flashfoward to...the last time I made pita bread, when I dropped the pita. I'm flying through drawers, whipping out spatulas and tongs and forks, trying to figure out the best way to rescue this little demon before he burned my apartment complex down. Finally, the pita was nestled out of the crack of the oven and onto a plate, where it looked perfectly done. Of course.
In it's defense, the batch did turn out tasty and I didn't have to spend money on it. It was just very labor intensive and turned out rather crispy.

Today, I decided to try a new recipe. This one had slightly different methodology. It can be found here.
I don't remember the actual recipe for the first batch, so I couldn't tell you if they were different or not. I can, however, tell you that in this recipe, I:
-Used honey instead of sugar
-Kind of wished I'd used wheat flour, because I eat white breads too much
-Needed probably a full extra cup of flour than called for. That's Rexy for you though.

This recipe didn't require me to flip the pita, which was a huge plus. I'm still amazed that the little buggers cook in 3 minutes! It also recommended using the bottom of the cookie sheet, which seemed a lot better for this task. I now have a stack of delicious pitas sitting on my counter, perfectly done, and without a single burn on my hands. Now, for the hummus.

I hesitate to really review this because I question it. Even though I sit here eating it with carrots while I type, it still concerns me. Part of my thriftiness comes from the bulk bins at Winco, which is the place to get spices, grains, (candy) and other things that you want in greater or lesser quantities than you can find on a shelf. In our last jaunt, I found hummus mix. You add water and EVOO and suddenly, hummus. I don't know if it's the right texture or anything. I just know that powdered hummus makes me suspicious, but I added red pepper flakes and it masks the carroty taste of these carrots quite nicely. If anyone tries it out, let me know what you think?

Happy eating!

Tuesday, January 1, 2013

The Review Board

I kind of have this desire to start reviewing things, on top of the regular blog posts (that I haven't made in four months, oops.) I mean, I have no idea what I'd review. Everything? Books, recipes, products? Everything sounds good. But where to start?

Well, in an effort to be more thrifty, I've been trying to homemake a bunch of stuff. We go through a healthy amount of salsa in our home, and our neighbors brought us some of their scratch salsa which made me crave the not-jarred stuff even more. I started with a recipe: Alton Brown's Salsa. I usually choose Alton Brown recipes for things I've never made before because the videos that accompany them are really helpful and they are typically simple and delicious.
We hit a few snags (WinCo didn't have jalapenos or regular limes. What's up with that?) Jared substituted a couple other chiles (he can't remember what kind) for the missing jalapenos, and ended up putting the juice of five key limes in. The salsa filled the biggest bowl I own on Saturday. Today (Tuesday) we finished it off. It took about a bag and a half of chips. I meant to freeze some of it so we could have salsa whenever we needed it, but it just kept getting better the longer it sat. So, without further ado, here's my official review:
It really did get better every day. When it was first assembled, it wasn't my favorite. It was kind of...bitter? Regardless, by the time we finished it today I was inhaling it. Definitely respect the "let sit for 12 hours" instruction. I wish we'd added more heat. We weren't sure how it would turn out, so we mellowed out half the jalapenos. Next time I make it, I'll have to separate and freeze half of it before announcing that it's done.

Tada! I reviewed something! I'll get better as I go, I hope.

As far as home-life is going, Jared and I have enjoyed our little apartment. It's definitely coming together. Plus, college apartments are never dull. When I had to bail on our neighbors because I wasn't feeling well, she asked if I was positive sick, or negative sick. Nope, I'm not preggers. Funny way of asking, though! Rexburg is covered in snow, and has been for a few weeks now. We got a white Christmas! I'm (still) job hunting, and Jared starts school next week. Back to the grind we go!